
RedNotebook by Jendrik Seipp is one of my favourite free open-source multi-platforms applications.
It is a digital version of the good old lab notebook, that is usually red, and that is often used by scientists and researchers in labs around the world. It can be used to log experiment results, to take meeting notes, to manage a to do list, to write thoughts on a specific issue, to doodle, and the list of options goes on and on.
Analogue red notebooks are great, however, they are missing a crucial feature, namely, the ability to search for a specific word, or a combination of words. Another drawback on the analogue notebooks is size, weight, storage space needed. And if you are running a lab for 20 years, you must have many notebooks taking so much space in the office, and again looking for a specific result, or a specific idea that you noted in your notebook several years ago is a protracted process.
On the other hand rednotebook, the app, have all the features of analogue notebooks, with the added value that comes with the digital age, the search feature, the easy to navigate calendar, and the possibility to keep multiple-backups of the entire record regularly, and if ability to copy/paste text, images, code snippets, diagrams and tables.
A quick Google search for the terms “Agenda” or “Notes keeping apps” will yield many result. All looking sleep and attractive, teaming with killer features, integration with other apps and so on. So why rednotebook? Why settle for what seems to be a lesser tool at the first glimpse ?
The answer is a result of a 30+ years of experience as a multi-platform power user of IT solutions.
Basically when choosing a software/tool to keep notes for decades then the software should:
- Stores the notes as raw text (so that it is indexible and searchable with standard string search tools)
- Stores the data primarily locally (not remotely)
- Stores the data in an open standard format (to avoid data-locking).
This way, if the software you are using discontinued, you will still be able to search through the files and will still be able to find what you are looking for without the need for that App. This will also make it possible to migrate the alternative software.
rednotebook satisfies all three rule, on top of that, it is a free (free as in freedom) open-source software that is free of charge, it was developed for Linux. However, it can be ported to Windows, and also to Mac OS X (with a small manual effort)
If you want to run the latest version of rednotebook on you Mac OS X machine, follow the instructions below to install the software from source.
Installation Instruction
First let’s clone the repository to a special directory in our home folder
$ mkdir ~/Documents/workspace
$ cd ~/Documents/workspace
$ git clone https://github.com/jendrikseipp/rednotebook
Now let’s try to run rednotebook, to check what dependencies are required:
$ cd ~/Documents/workspace/rednotebook
$ chmod u+x run
$ ./run
We need to install GTK+ for Mac OS X. The easy way to do it, is to use the script:
$ cd ~/Documents/workspace
$ wget https://gitlab.gnome.org/GNOME/gtk-osx/raw/master/gtk-osx-setup.sh
$ chmod u+x gtk-osx-setup.sh
$ ./gtk-osx-setup.sh
$ rm gtk-osx-setup.sh
Now let’s install the dependencies
$ brew install pygobject3 glib libffi cairo gtksourceview3
$ brew install gdk-pixbuf atk librsvg
$ brew install gsettings-desktop-schemas adwaita-icon-theme
$ brew install enchant
The following command, installs the required packages to the Python3 packages library. Here we assume that you have python3 and pip3 installed and configured on your Mac OS X machine.
$ export PKG_CONFIG_PATH="/usr/local/opt/libffi/lib/pkgconfig"
$ pip3 install pygobject pyyaml

$ gdk-pixbuf-query-loaders > /usr/local/lib/gdk-pixbuf-2.0/2.10.0/loaders.cache

$ glib-compile-schemas /usr/local/share/glib-2.0/schemas/

$ chown -R `whoami`:admin /usr/local/share/locale/
$ wget https://icon-theme.freedesktop.org/releases/hicolor-icon-theme-0.17.tar.xz
$ tar xf hicolor-icon-theme-0.17.tar.xz
$ cd hicolor-icon-theme-0.17
$ ./configure --prefix=/usr/local/
$ sudo make install
$ cd ..
$ rm -rf hicolor-icon-theme-0.17
Now we are ready to install rednotebook:
export LANG=en_US.UTF-8
export LC_ALL=en_US.UTF-8
$ cd ~/Documents/workspace/rednotebook
$ pip3 install --user .
That commands copies the rednotebook python script to /usr/local/bin. You can check if that worked by changing to the /usr/local/bin directory and looking for the “rednotebook” script. If your PATH environment variable was setup correctly to include you must be now able to call rednotebook from the command line prompt.
You can test that the system finds rednotebook by typing:
$ which rednotebook
And you can make sure /usr/local/bin is currently setup in the environment by checking the output of the following command
$ env | grep PATH
If everything went well, rednotebook is now ready to run for the first time. Run the rednotebook command:
$ rednotebook
You can settle for the option of running rednotebook in a Terminal window by typing the command, but if you want rednotebook as an App in the Applications folder, then we need to create a Mac OS X App.
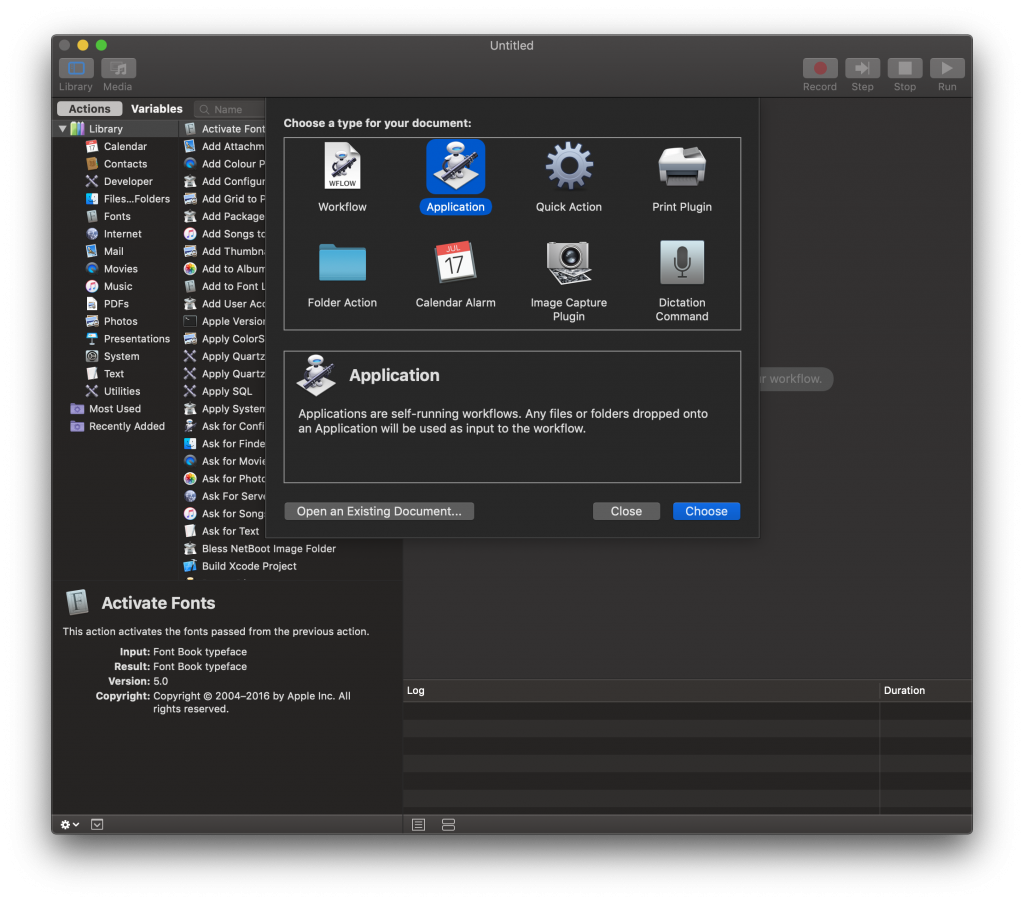
The easiest way, in my opinion to create the App that runs the rednotebook shell script is by using the automator.app. The steps are described in the screenshots:
- Chose “Application” from the list of document types:
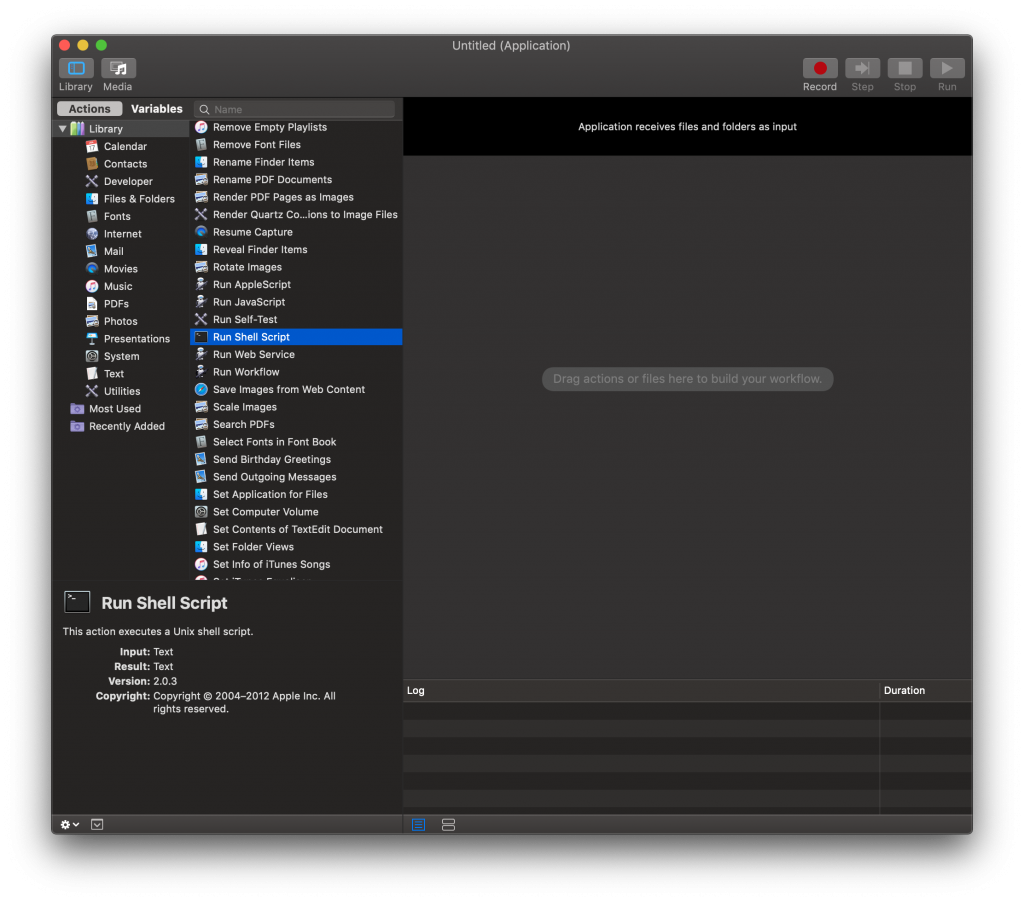
- Chose “Run Shell Script” from the action library
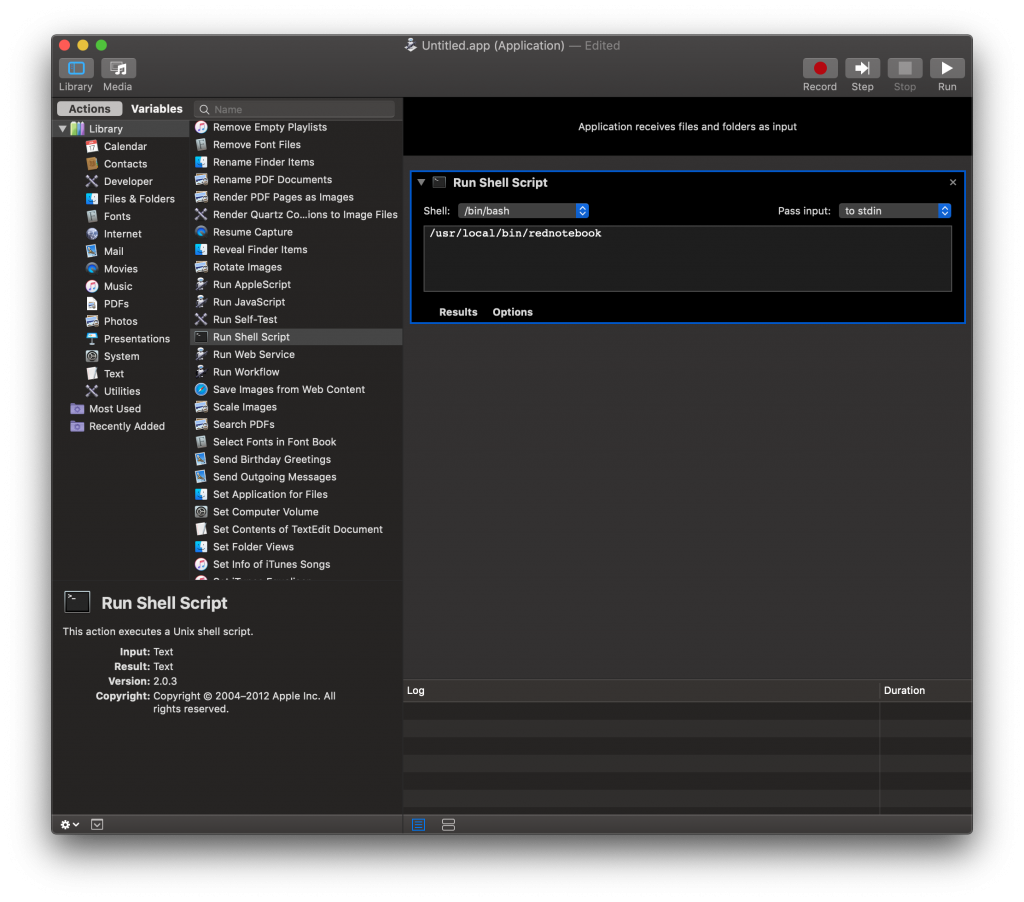
- Add the command to run RedNotebook in the box. Make sure to include the path to the executable.
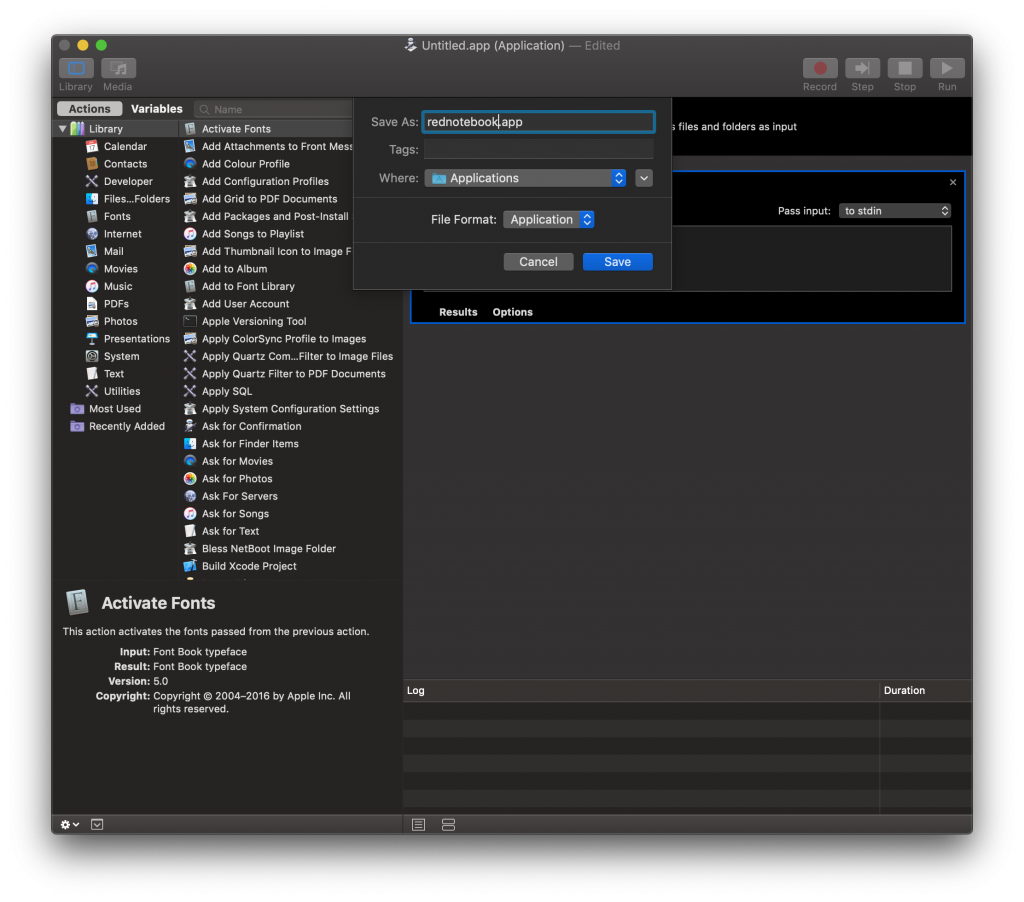
- Save the automation document in the Application folder as rednotebook.app
Now that the rednotebook.app is in the Application folder, you can start it by double clicking the icon like any other app. However, app has the automator icon. To change that, follow the following instructions:
- Select the app in the Application folder, and click ⌘ + i to open the information window about the rednotebook app
- Click on the small icon in the upper left corner of the information window to select it. If you did it right, the icon should be highlighted.
- Copy the rednotebook png image below, and go back to the information window of the rednotebook app. and paste the image onto the information window (with the small automator icon selected). That will replace the automator icon with the rednotebook image.

Another way to create a Mac OS X app from a shell script, you can use the following smart and minimal script called appify by Mathias Bynens. The script at the moment of creating this post looks like this:
#!/bin/bash

if [ "$1" = "-h" -o "$1" = "--help" -o -z "$1" ]; then cat <<EOF
appify v3.0.1 for Mac OS X - http://mths.be/appify
Creates the simplest possible Mac app from a shell script.
Appify takes a shell script as its first argument:
    `basename "$0"` my-script.sh
Note that you cannot rename appified apps. If you want to give your app
a custom name, use the second argument:
    `basename "$0"` my-script.sh "My App"
Copyright (c) Thomas Aylott <http://subtlegradient.com/>
Modified by Mathias Bynens <http://mathiasbynens.be/>
EOF
exit; fi

APPNAME=${2:-$(basename "$1" ".sh")}
DIR="$APPNAME.app/Contents/MacOS"

if [ -a "$APPNAME.app" ]; then
	echo "$PWD/$APPNAME.app already exists :("
	exit 1
fi

mkdir -p "$DIR"
cp "$1" "$DIR/$APPNAME"
chmod +x "$DIR/$APPNAME"

echo "$PWD/$APPNAME.app"
However, i will explain this later because i am hungry and i don’t want my date to wait… tbc.